-2.png?width=1080&height=1080&name=Untitled%20design%20(5)-2.png "bemo logo")


In this blog post, we're going to walk you through the step-by-step process for setting up Office 365 Advanced Threat Protection (ATP). Setting up ATP is important for email security, but it's just one part of a complete strategy to keep emails safe.
This blog is the 4th post of a 5 post series titled Your Complete Guide to Microsoft Email Security. The 5 steps to email security are:
- Configure DKIM, DMARC, SPF
- Deploy EOP (Exchange Online Protection)
- Set up Office Message Encryption
- Enable Office 365 ATP (Advanced Threat Protection) - this blog
- Enable Office 365 MFA with Authenticator App

There are three parts to setting up Office 365 Advanced Threat Protection:
To enable Office 365 ATP you will need one of the follow licenses:
- Office 365 ATP Plan 1
- Office 365 ATP Plan 2
- Microsoft 365 Business Premium (formerly known as Microsoft 365 Business)
- Office 365 E5
- Microsoft 365 E5
OK, let's get started!
- Go to https://protection.office.com/homepage using an 'incognito' (private) session on a Chrome browser
- Sign In using your global admin credentials
- Click on Threat Management
- Click on Policy
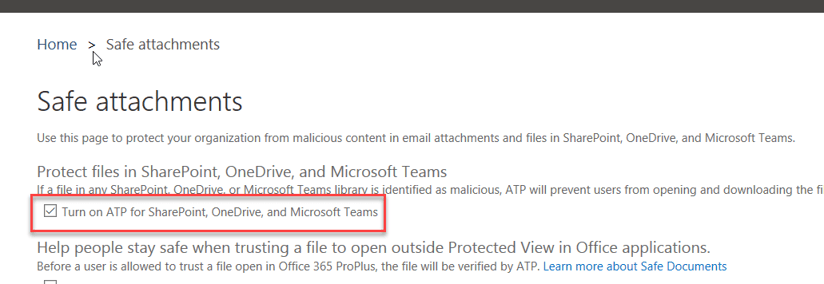
Part 1 - Office 365 ATP Safe Attachments
Once the appropriate licenses are assigned to all of your users, follow these steps to implement the 'Safe Links' feature:
- Click on ATP safe attachments
- Enable the check box for Turn on ATP for SharePoint, OneDrive, and Microsoft Teams
- Click on +
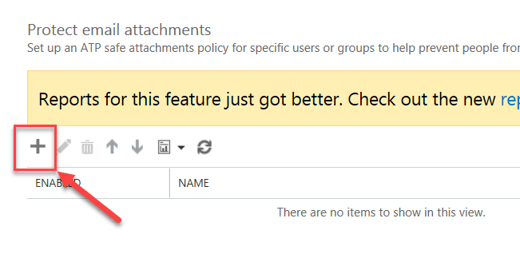
- Give a name to your policy
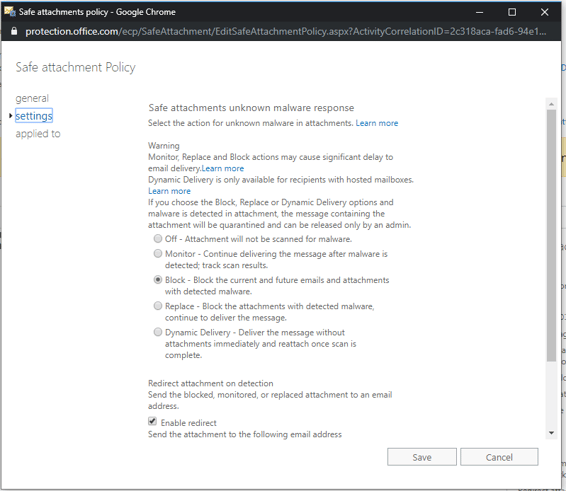
- Select the Replace option
- Turn on Enable redirect and enter the alias of the IT Manager or IT team = service@bemopro.com so we receive a ticket
Option 1 - More restrictive policy
Option 2 - Less restrictive policy
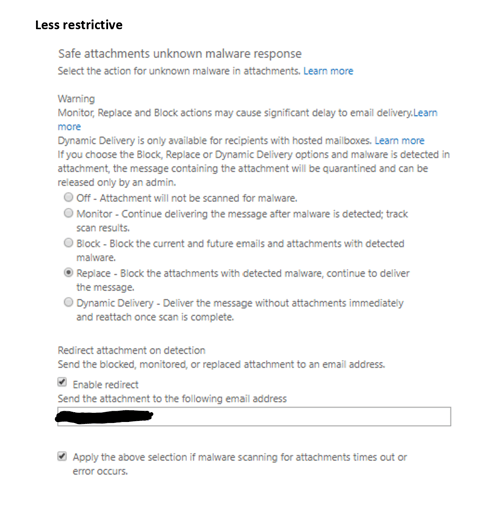
Check the box for Apply the above selection if malware scanning for attachments times out or error occurs
Apply the rule "If the recipient domain is"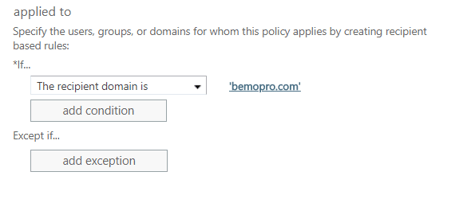
Note: It can take from 5 sec to 5 min to apply settings to tenant
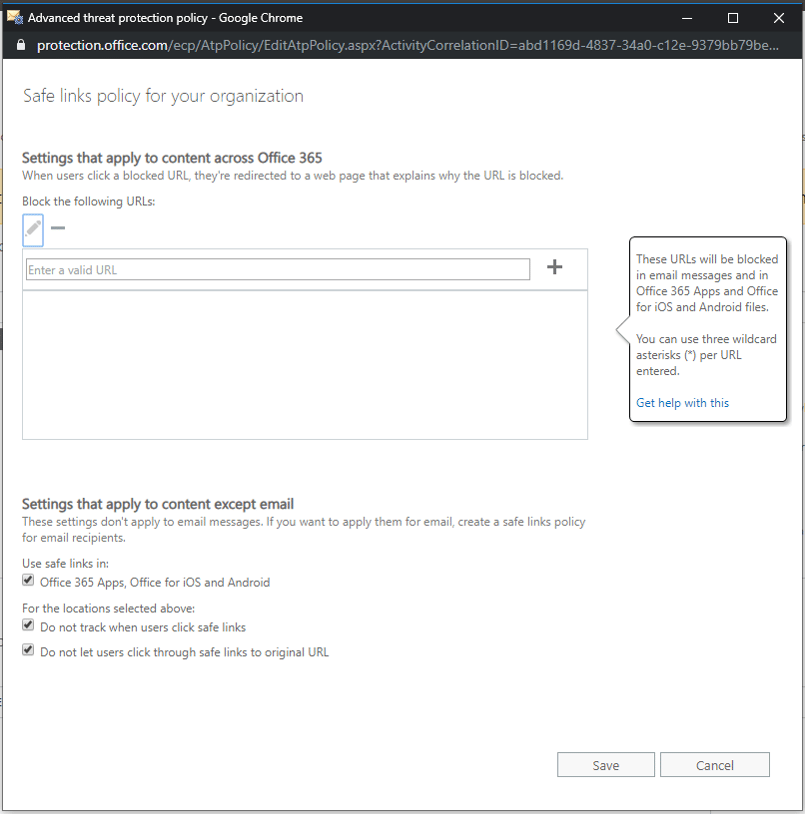
Part 2 - Office 365 ATP Safe Links
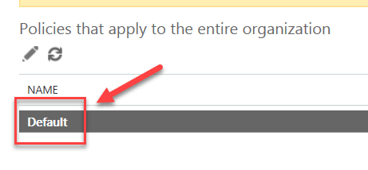
Click on ATP Safe Links, then Double-click on Default
A popup window will open
- Check the box for Office 365 Apps, Office for iOS and Android
- Check the box for Do not track when users click safe links
- Check the box for Do not let users click through safe links to original URL
- Click Save
ATP Safe Links has been set up!
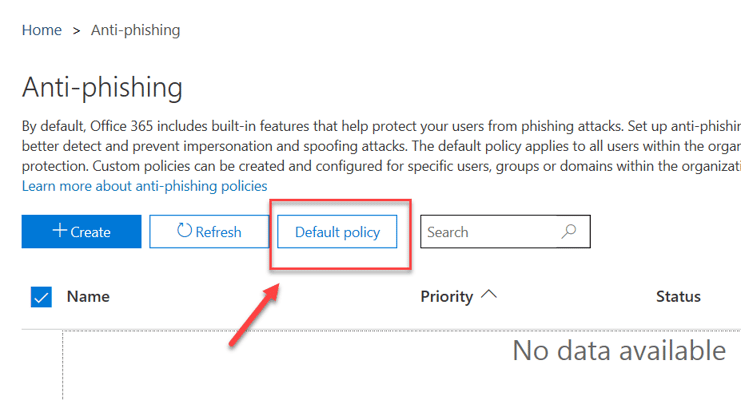
Part 3 - ATP Anti-phishing
- Click on Anti-phishing
- Click on Default policy
The following window will show up:
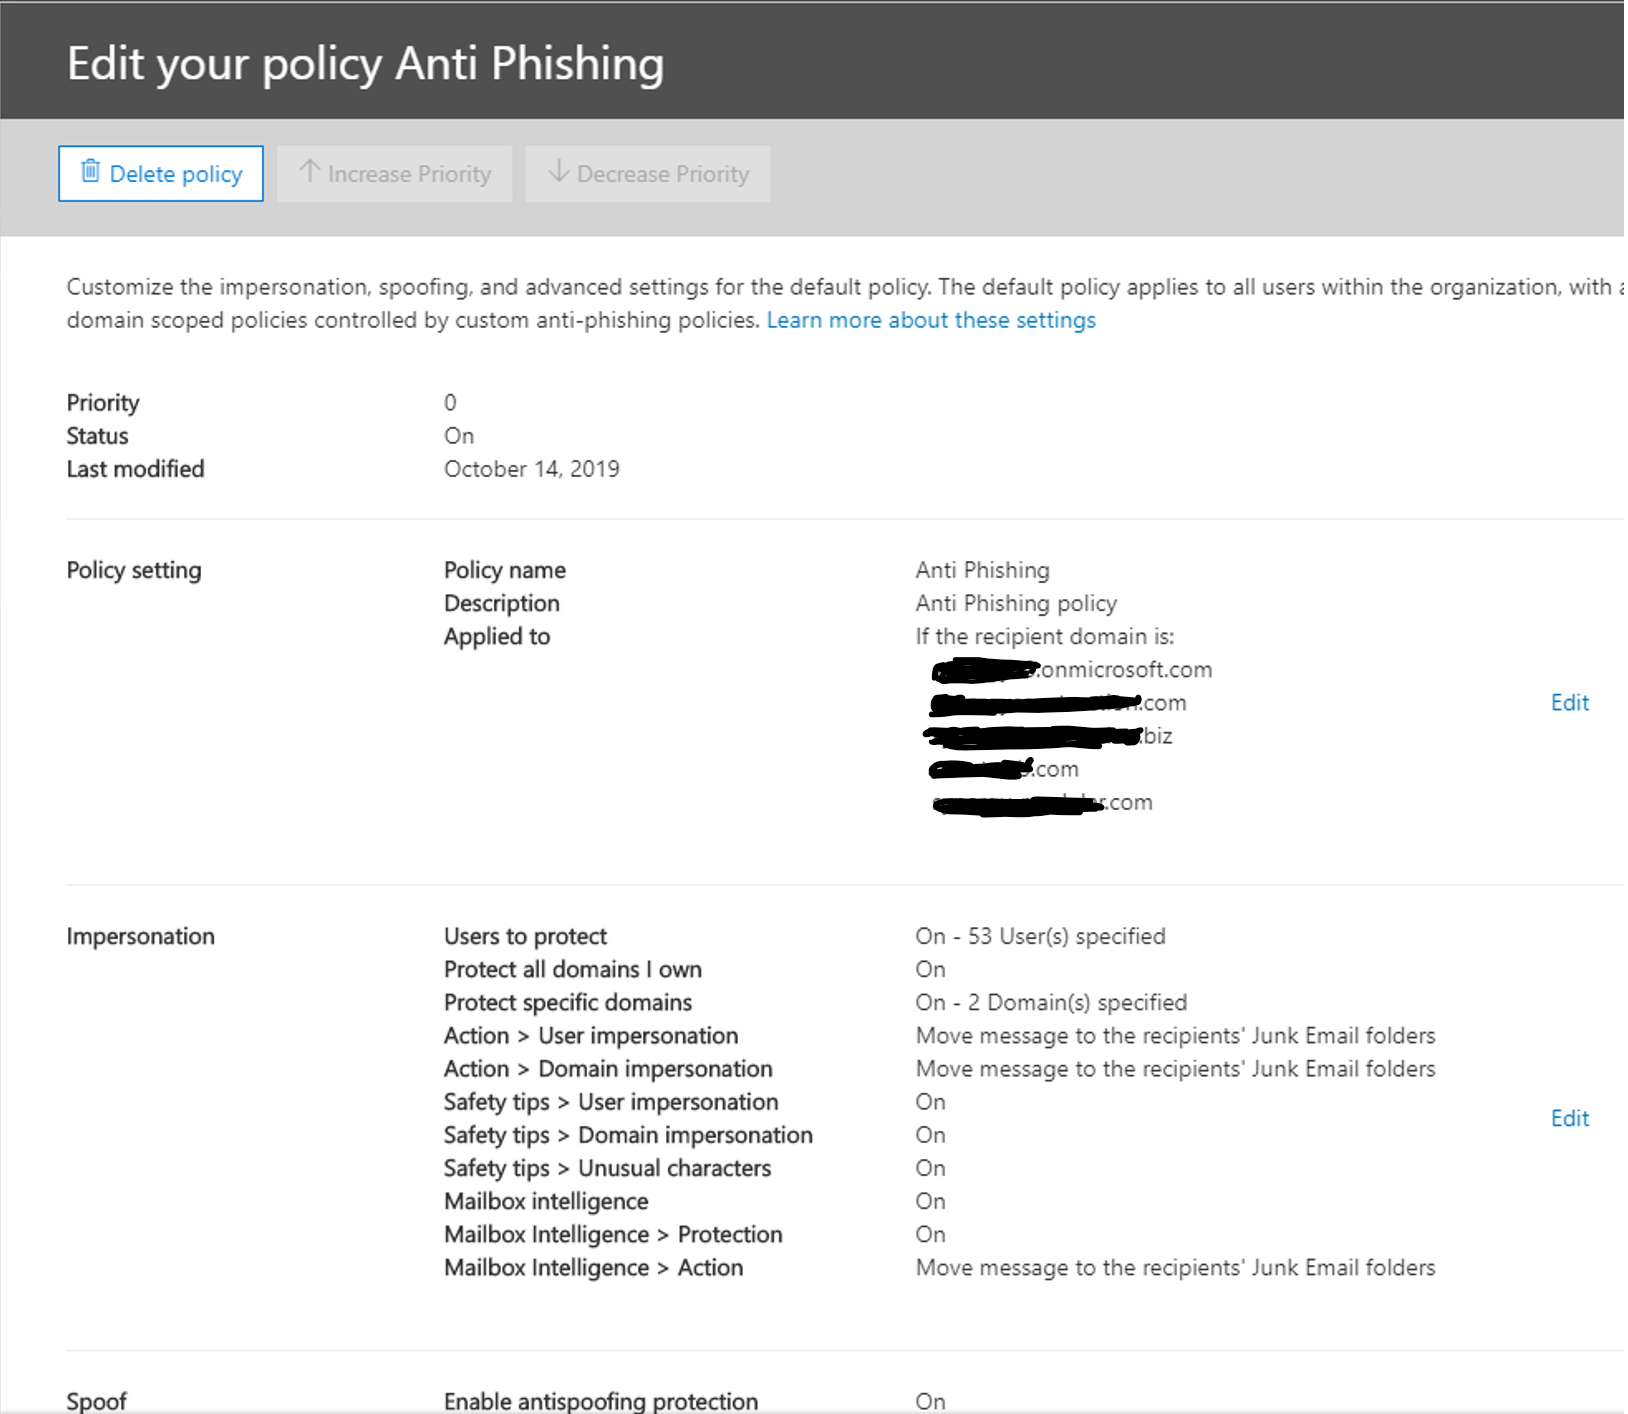
Within the Impersonation section, click Edit
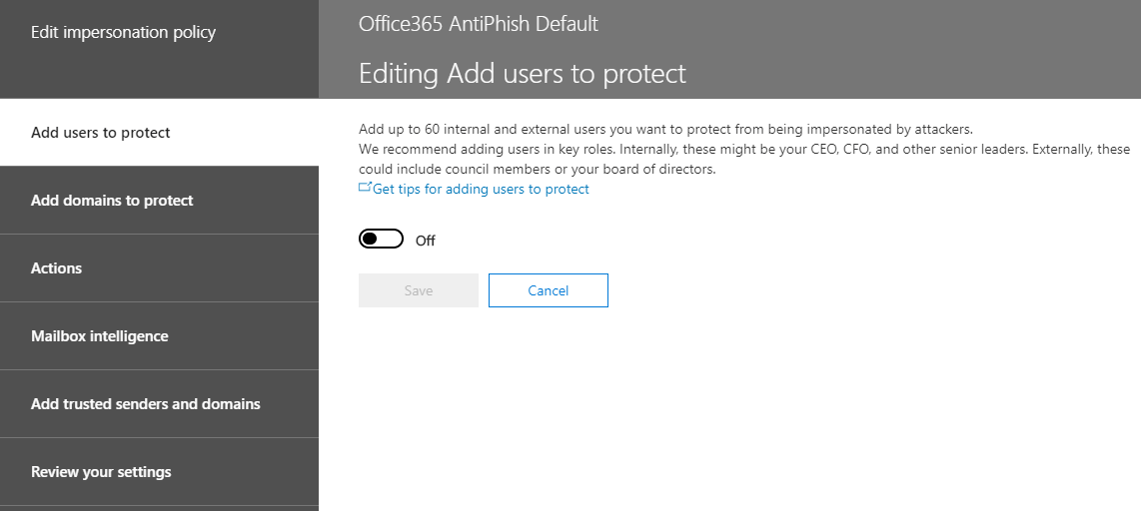
- Switch the button from Off to On
- Click Add user
- Add the Email address of the user and click Save (note: you cannot add more than one user at a time).
- Repeat steps 5 and 6 until you have added all users
- Click on Add domains to protect
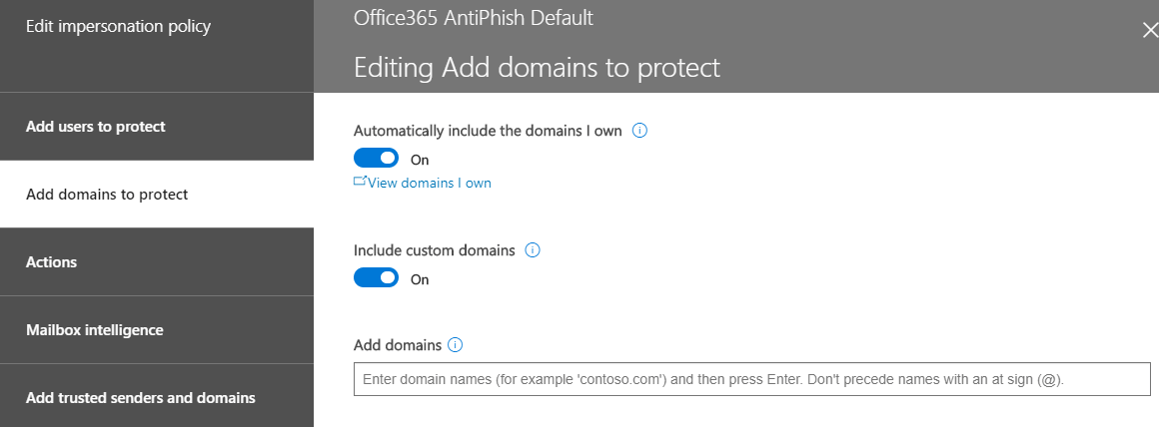
- Turn on Automatically include the domains I own and Include custom domains
- Click on Actions
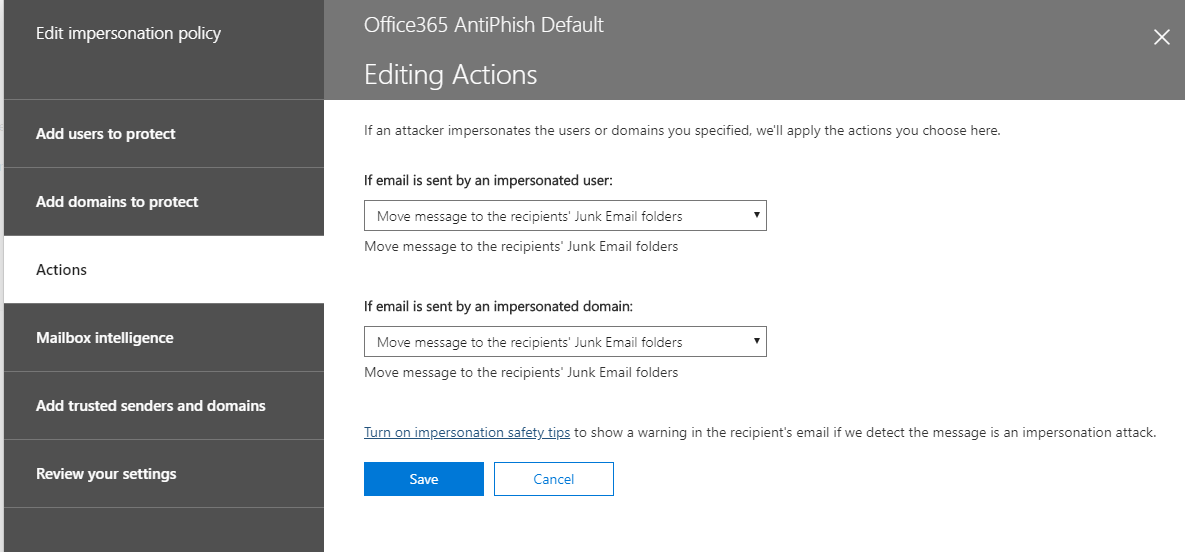
- Under if email is sent by an impersonated user, select Move message to the recipients' Junk Email folders
- Under if email is sent by an impersonated domain, select Move message to the recipients' Junk Email folders
- Click on the link Turn on impersonation safety tips

- Turn on all 3 switches (Show tip for impersonated users, Show tip for impersonated domains, and Show tip for unusual characters)
- Click Save
- Click on Mailbox Intelligence
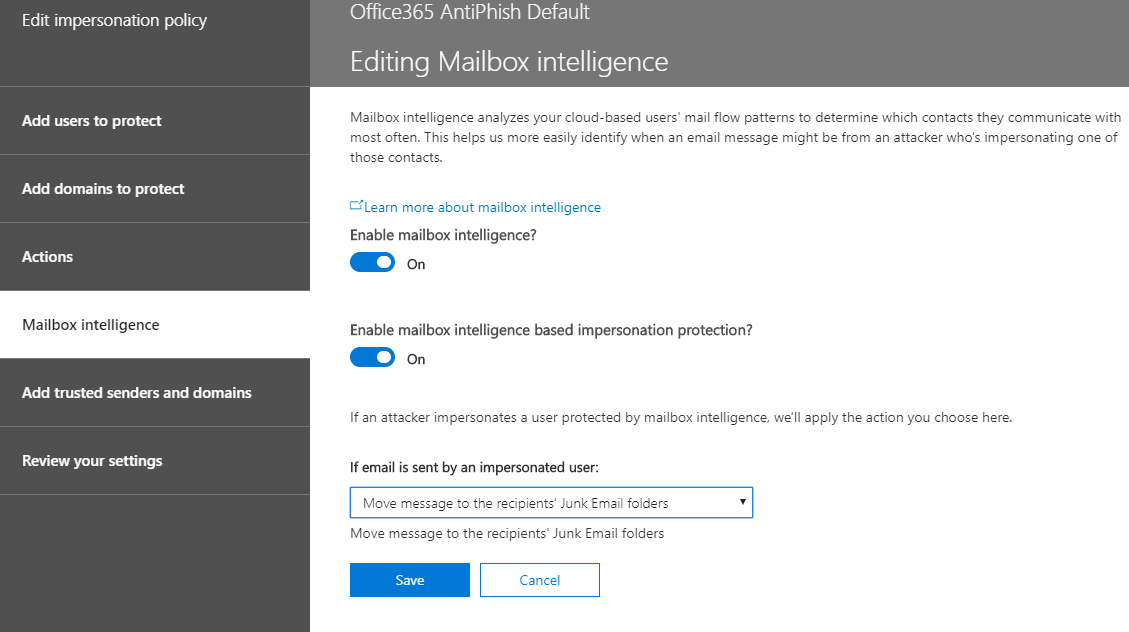
- Turn on Enable mailbox intelligence
- Turn on Enable mailbox intelligence based impersonation protection
- Under if email is sent by an impersonated user, select Move message to the recipients' Junk Email folder
- Select Add trusted senders and domains. You should have nothing to do there
- Click on Review your settings
- Once you have reviewed the settings and everything looks good to you, click Save
- Click Close
Congratulations! The settings for Anti-Phishing are now all set up!
Not looking to do this yourself?
Schedule a meeting with us to learn more about implementing Office 365 ATP and all the other email security tools offered by Microsoft.

Sign up & receive BEMO content right to your inbox.

Leave us a comment!